Table of Contents
- Table of Contents
- Overview
- Create an original restore point.
- Upgrade Cloud Director from 10.2.2 to 10.3.3
- Backout/Rollback Plan
NOTE: I thought I had already released this article about 10 months ago, somehow it did not get created. I apologize to thsoe who consistently utilize resources like this and needed it in a more timely fashion.
Overview
Our configuration at the start of this process is Cloud Director 10.2.2 installed and successfully running on the VMware appliance with embedded postgres DB. By the end of this process we will be running Cloud Director on the same VM just upgraded version to 10.3.3. It’s highly advise a clone is created prior to any work being performed as this is a highly complex process. If you run multiple cells then we suggest you remove all additional cells and perform this work on a single cell, then simply deploy new cells once the primary is successfully working. This method assumes isolation from direct access to download updates, due to this the article is written around creating ISOs, mounting CDs, etc. More information about Cloud Director 10.3.3 can be found here.
Create an original restore point.
- Create a clone of the Cloud Director VM.
- Create a snapshot of the Cloud Director VM.
Upgrade Cloud Director from 10.2.2 to 10.3.3
- Download Cloud Director gz file “VMware Cloud Director 10.3.3 - Virtual Appliance update package” from VMware. This file will be in the following naming convention: VMware_Cloud_Director_vv.v.v.vvvv-nnnnnnnn_update.tar.gz
- After downloading the update package create an iso out of the file, we recommend folder2iso, and mount it as a CDROM.
- If you have multiple cells then use your favorite browser log into your VAMI interface at https://appliance_ip_address:5480 to determine which cell is the current primary, you need to use the primary appliance when you do the database backup/upgrade later in this process. While we do not run multiple cells the best procedure we have found would be to remove all additional nodes except the primary and upgrade the primary node. Then re-install all additional nodes from a fresh ISO.
- Log into the appliance via SSH and insure the directory /mnt/cdrom exists, if not create it by running: mkdir /mnt/cdrom
- Mount the CDROM.
mount /dev/cdrom /mnt/cdrom - Create a new director to hold the update content.
mkdir /tmp/local-update-package - Extract the package in the newly created directory.
tar -zxf /mnt/cdrom/VMware_Cloud_Director_10.3.3.7837-19780584_update.tar.gz -C /tmp/local-update-package - We now need to configure the update repository to use this directory.
vamicli update --repo file:///tmp/local-update-package - Test to ensure the update directory is being read correctly. If it is then you should be presented with the release version.
vamicli update --check - Check the cell status to ensure no jobs are running.
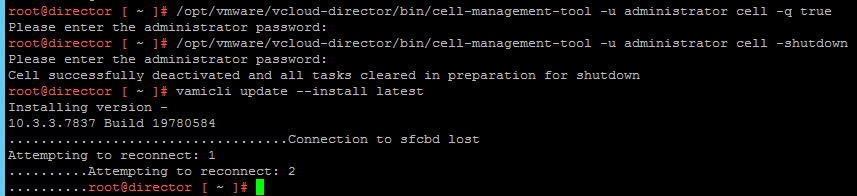
/opt/vmware/vcloud-director/bin/cell-management-tool -u administrator cell –status - Quiesce the cell to prevent new jobs from running and complete existing jobs.
/opt/vmware/vcloud-director/bin/cell-management-tool -u administrator cell –q true - Shutdown vCloud Director management cell. NOTE: If there are queued jobs then you can override the wait by running: service vmware-vcd stop
/opt/vmware/vcloud-director/bin/cell-management-tool -u administrator cell –shutdown /opt/vmware/vcloud-director/bin/cell-management-tool -u administrator cell –status - Apply the upgrade to the cell.
vamicli update --install latestNOTE: When you do this you will probably receive the error “Connection to sfcbd lost” and it will automatically re-attempt at connecting and eventually succeed. This is documented by VMware in the release notes.
- On the primary appliance we noted above run the DB backup process.
/opt/vmware/appliance/bin/create-backup.sh - Now lets upgrade the Cloud Director database utility.
/opt/vmware/vcloud-director/bin/upgrade - When prompted with “Do you wish to upgrade the product now? [Y/N]” enter Y
- When prompted with “Enter [Y] after the backup is complete.” enter Y
- When prompted with “Start it now? [y/n]” enter N
- Reboot the Cloud Director appliance.
shutdown -r now - Once the appliance is done rebooting log into your web interface and ensure everything is working as expected.
- It is recommended to keep the snapshots for 1 to 5 business days and the clone for up to 10 business days.
NOTE: If you run into a problem not being able to access /provider URL then you might have to ensure the URL you are supplying the browser is allowed. Cloud Director 10 is explicit in the URLs that it will accept as source. You can look at this article here if you need to modify your URLs called Troubleshoot Failed Access to the Cloud Director User Interface.
Backout/Rollback Plan
- Power off the original appliance and then proceed to next step.
- Revert to the snapshot created at the beginning of this process. Confirm the snapshot allowed the configuration to come back online, if it does not then proceed to next step.
- Restore the clone that was created at the beginning of this process. Confirm the clone allowed the configuration to come back online, if it does not then proceed to next step.
- Build a new Cloud Director appliance VM and restore the database backup that was created towards the end of the process. Confirm the backup allowed the configuration to come back online.